
I have always loved fresh strawberries. We managed to grow a few plants last year and I enjoyed half a dozen berries in the garden. They never made it into the house as I could not wait to enjoy them. I want to get a lot more produced this year and in the years to come. They did not work out well in the garden last year and nothing survived to this year. I also tried them in half barrels one year in my gutter garden. That year they grew well then suddenly they got a mold and died. I have been doing some research and think we are going to try some strawberry towers this year. CaliKim29 on YouTube has several videos that I have taken my inspiration from. She had issues with getting water to the plants in the lower crates and came up with using a tube to get water to them. My solution is to use the ollas I am building in the crates to keep a steady supply of water to the plants.
We got your typical bagged strawberry plants from both Walmart and Lowes. They come 10 plants to a package for about $6. We got three varieties, Quinault, Ozark Beauty and two packages of Sequoia. I was not sure how many plants I would be able to put in each crate so this was my starting point. Before I started working on the crate I opened a package of strawberries, removed the elastic band and separated the crowns. I then trimmed off dead parts from the top and tidied up the roots. The roots were then put into a bowl of water to soak while I worked on the crate. Honestly, even getting these right when they came to the stores, the plants did not look to be in the best of shape. Fingers crossed…

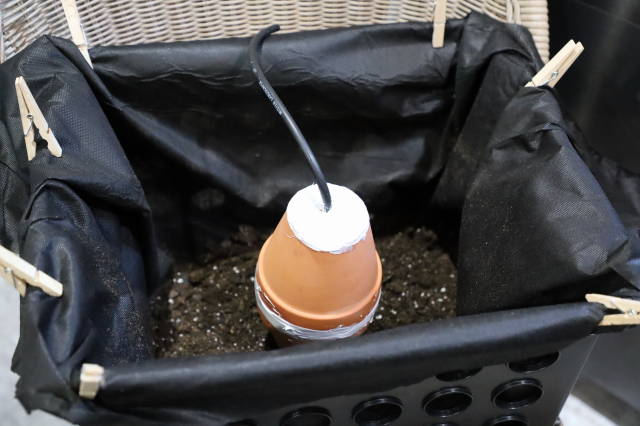
We started our project with some crates from Walmart. I found these in the office supply aisles and in my area they were about $7/each. What I liked about these was their rectangular shape and round openings evenly spaced around the crate. These holes will make it easy to insert strawberry plants into the soil. The crate was then lined with weed barrier cloth. It was wide enough I just cut a length to go from one of the long sides, down into the crate and back up the other side. Some clothespins are helpful in holding the fabric in place as you work to get it cut then filled with soil. Once the fabric was in place I added an inch or two of a quality potting mix with some fertilizer in it on the bottom. Then we place an olla in the center of the crate and added a little more soil.
If you are going to plant in the lover part of the crate you need to cut your openings and put your strawberry plant in before completely filling the crate. I cut my opening with the soil just above where I was putting the plants. A sharp pair of scissors were used to cut an “X” in the fabric. I then moved some of the soil away from the crate and inserted a strawberry plant. I did most of them by pushing the roots from the front into the crate then pulling the roots back until the crown was at the edge of the fabric. I pulled the roots back and down as I was pulling. Once I had the plant in place I moved he soil back over the roots and up against the crate. I continued to do this all around the crate.

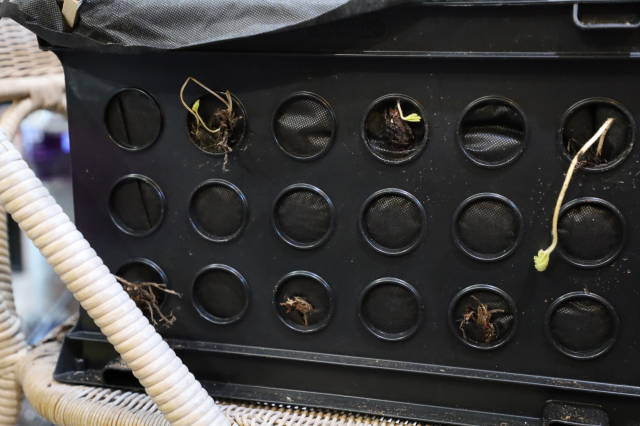
These crates will get sun from all sides and so I planted all four sides. I planted the top and bottom rows of holes, leaving the middle for runners to grow in. Once we got all the bottom holes planted I added more soil and continued up to the top row of holes. In addition to the potting mix we added some of our “chicken dirt”. I have an area that some of my birds get turned out into and they scratch around in this and work leaves and kitchen scraps that get tossed in for them into a nice soil. There are also bits of shavings that get kicked out of the pens that adds some texture and moisture holding ability. This chicken dirt makes a nice soil for planting in. We also periodically remove similar dirt from the coops before adding fresh shavings. More often than not this dirt ends up in the garden, but it is wonderful mixed with a potting soil in my house plants. While doing the crate we alternated a layer of the potting soil with a layer of chicken dirt. We then used fingers to toss the two together and mix them some.

We did the top row of plants the same as the bottom.. cutting the fabric, moving soil away and inserting the plants. The roots were covered and more soil was added until the olla was almost covered. I plan on adding a layer of straw as mulch to fill up the top inch or so. Planting all four sides and doing the top and bottom rows I was able to put 20 plants in this one crate. We will need another trip to the store get more of the other varieties to do two more crates for my tower.
Once the other crates are planted I will stack them and set them on a base. Not sure if we will just get another crate or use some cinder blocks. Either way, I want to elevate the crates up above the ground a bit. I have some roosters running the yard and would like the fruit up where they will not have easy access to it. I am not planting the tops of the crates because they will be stacked on top of each other. The top crate will have the water reservoir that will feed the ollas. I plan on using an empty plastic cat litter bucket as the reservoir feeding water to the ollas below. I am not sure how to engineer that right now.. pretty sure will stack everything and rig something up to make it work. Will update when we get it figured out.
I had planned on doing towers 3 crates high and having 2-3 towers. If I get 20 plants per crate, that is 60 plants per tower. Adding additional towers will get me to 120-180 plants. Wow.. if we are successful that will be a LOT of strawberries. Pretty sure they will make it into the kitchen with those numbers. Time to research making jelly and preserves.
